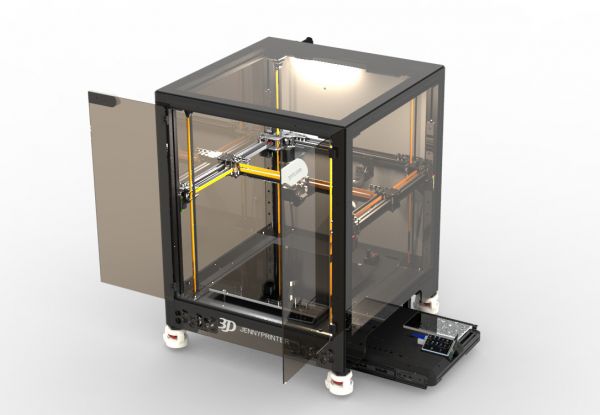
Jenny corexy voron V1.2 mainpage
Overview
this is mainpage of jenny corexy 3d printer V1.2
jenny corexy is a metallized structure inspire by vorondesign voron2.4.
we use a more stable 4040 extrusions frame,but keep 2020 extrusions as gantry let it not too heavy. The gantry use a 9mm widened belt,to keep a bigger print size. Also expanded the width of the linear rails.
All structural part use aluminum sheet with stainless steel column let printer can stable in high temperature environment.But some of the beautiful parts that don't matter are whit 3D printed.
I also modified the leveling probe, using a structure I named JennyTouch. It is a contact type photoelectric sensor mechanism,can probe aluminum 、PEI、 glass and any solid platform.
Resources
Communication
- discuss (trouble shooting and feature suggestions)
- facebook (assembly show and printing show)
- youtube (Serial Request and development show)
- discord (timely communication)
Brief assembly instructions
preparatory work
Attention
setup firmware
Debugging
PID
use this command to calibrate hotend pid:
PID_CALIBRATE HEATER=extruder TARGET=220
And this command to calibrate bed pid:
PID_CALIBRATE HEATER=heater_bed TARGET=60
when finished will have some information like this:
PID parameters: pid_Kp=18.731 pid_Ki=0.827 pid_Kd=106.065 The SAVE_CONFIG command will update the printer config file with these parameters and restart the printer.
Use this PID value in printer.cfg
more info Klipper PID calibrate.
Calibrate extruder pressure
NOTE:When you have send this part of the command,if you want to print another gcoode,restart 3d printer please.
- Prepare for the test by issuing the following G-Code command:
SET_VELOCITY_LIMIT SQUARE_CORNER_VELOCITY=1 ACCEL=500
- This command makes the nozzle travel slower through corners to emphasize the effects of extruder pressure. Then for printers with a direct drive extruder run the command:
TUNING_TOWER COMMAND=SET_PRESSURE_ADVANCE PARAMETER=ADVANCE START=0 FACTOR=0.005
- After that,print this gcode: square_tower_test.gcode
- The pressure_advance value can then be calculated as pressure_advance = <start> + <measured_height> * <factor>. (For example, 0 + 12.90 * .005 would be 0.0645.)
Insert pressure_advance value in printer.cfg.
JENNY COREXY BGM extuder pressure_advance = 0.046 about.
more info Klipper pressure
Resonance compensation
NOTE:When you have send this part of the command,if you want to print another gcoode,restart 3d printer please.
- Increase max_accel and max_accel_to_decel parameters in your printer.cfg to 7000. remember save config and restart firmware.
in section [printer]:
  max_accel : 7000
  max_accel_to_decel : 7000
- Disable Pressure Advance:
SET_PRESSURE_ADVANCE ADVANCE=0
- execute command:
SET_INPUT_SHAPER SHAPER_FREQ_X=0 SHAPER_FREQ_Y=0
If you get "Unknown command" error, you can safely ignore it at this point and continue with the measurements.
- execute command:
SET_INPUT_SHAPER SHAPER_TYPE=MZV
- Execute the command:
TUNING_TOWER COMMAND=SET_VELOCITY_LIMIT PARAMETER=ACCEL START=1250 FACTOR=100 BAND=5
This command will increase the acceleration every 5 mm starting from 1500 mm/sec^2: 1500 mm/sec^2, 2000 mm/sec^2, 2500 mm/sec^2 and so forth up until 7000 mm/sec^2 at the last band.
- Print this ringing_tower_test.gcode
This PLA filament 0.4mm nozzle used in gcode.
- stop the print earlier or wait for the result
You can stop the print earlier if the ringing is clearly visible and you see that acceleration gets too high for your printer (e.g. printer shakes too much or starts skipping steps)
- Measurement and calculation
- Save parameter in printer.cfg
in section [input_shaper]:
  shaper_freq_x: ...
  shaper_freq_y: ...
  shaper_type: mzv
- Revert the changes to max_accel and max_accel_to_decel parameters
After finishing this Resonance compensation do not forget revert change this in printer.cfg
more info Resonance_Compensation
Use ADXL345 accelerometer Measuring_Resonances
Skew correction
- Add a section [skew_correction] in print.cfg
[skew_correction]
print this Skew_correction_test.gcode
- Take your measurements
measured length AC BD AD
example AC=140.5 BD=140.1 AD=99.92 unit mm
- Set management value in print_start and clear in print_end
In PRINT_START:
SET_SKEW XY=140.5,140.1,99.92
In PRINT_END:
SET_SKEW CLEAR=1
more info skew_correction
speed tune
Modify these speed values to make the printer faster while maintaining quality.
- In section [printer]:
  max_velocity: 200
  max_accel: 6000
  max_z_velocity: 10
  max_z_accel: 200
- In section [stepper_n]:
homing_speed: 130
- In section [extender]:
  max_extrude_only_velocity:100
  max_extrude_only_accel:3000
- in section [probe]:
speed: 80.0
- In section [quad_gantry_level]:
speed: 120
